At the end of a standard session, I might leave with a couple hundred photos. It is my goal to not just shoot blindly but to click that shutter button only when I feel it’s a great moment for a photo. Even so, there are so many distinct interactions in the course of an hour or two that it ends up being a lot to sort through. I shoot RAW so that I will have the most flexibility with my images when I take them home and will be able to apply all sorts of creative touches or just minimal brightening or touching up when they come out almost perfect as-is.
I start by loading my photos into Lightroom. I store my work on a series of 1 tb external drives (Costco!) since shooting RAW makes each image around 25 mb. It adds up quickly, so I rely on the drives for long-term storage. Once all images are loaded into Lightroom I work through them, rejecting any image that is unacceptable (person blinking, etc.). Then I look at each series of images (there might be 4-6 from the same vantage point and lighting) and pick the best from each series of shots. Usually by then I am left with 50-75 shots. Then I pick my the best 25-50 to pare down and concentrate on.
For each photo I usually do the following series of edits:
- Crop if needed. I almost never crop unless it is for printing at a certain size, but sometimes you gotta do it.
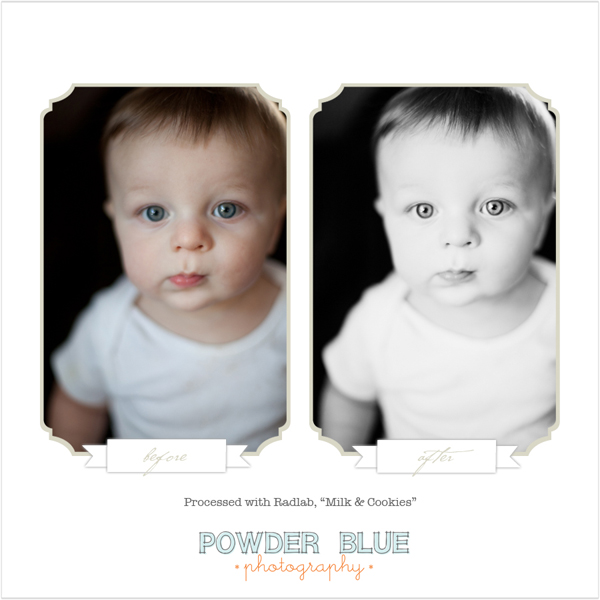
- Correct any distractions such as fuzz on the clothes or crusty boogers (happens all the time with babies!). You can see above that I had to remove a couple tiny crusties from Jonah’s nose. I also softened his left cheek because it looked a little blotchy to me.
- Usually there is a slight adjustment to brightness, contrast, and/or saturation here before I import to CS5.
- I have been using Radlab (via CS5) lately to add creative effects. I usually bring the strength slider way down so as to not overpower the image with effects and it typically is not too far off from SOOC, just enhanced slightly. Some of my favorite Radlab stylets are “sugar rush” and “lux soft.” I also use Radlab to convert an image to black & white if it seems appropriate, but more often than not my images remain in color. The photo of Jonah above looked really special to me in black & white–I used the “milk & cookies” b/w filter in Radlab because it upped the contrast and brought attention to his eyes.
- Sometimes I come up with a Radlab formula that I like for the whole series of images, so I will apply the same effect to every frame from a shoot and then adjust slightly for each image. I like most of the images from a session to have the same look, like they tell a story.
- Once I am done with all the photos, I return them to Lightroom and export them to JPEG files for sharing previews with clients, but I keep the RAW files for printing & storage.

